

Want to learn a super-easy way to compress your video file for email and social media platforms using VEED without sacrificing quality?
Social media apps like Instagram and Facebook Messenger have an upload video file size limit, and compressing your video is the only solution to this minor, yet frustrating, problem. Email clients also have a video file size limit of 20-25 MB.
Here’s a magic trick for you with VEED's easy-to-use video compressor. In this blog post, we’ll compress a video from 28 MB to under 1 MB... a great file size for email!
Not a believer? Read through and prepare to be amazed. Let’s go!
Step 1: Upload The Video To Start Using the Video Compressor

You can also upload YouTube videos. To do this, just click on the downward icon next to Upload Video/Audio. This should lead you to another pop-up box.
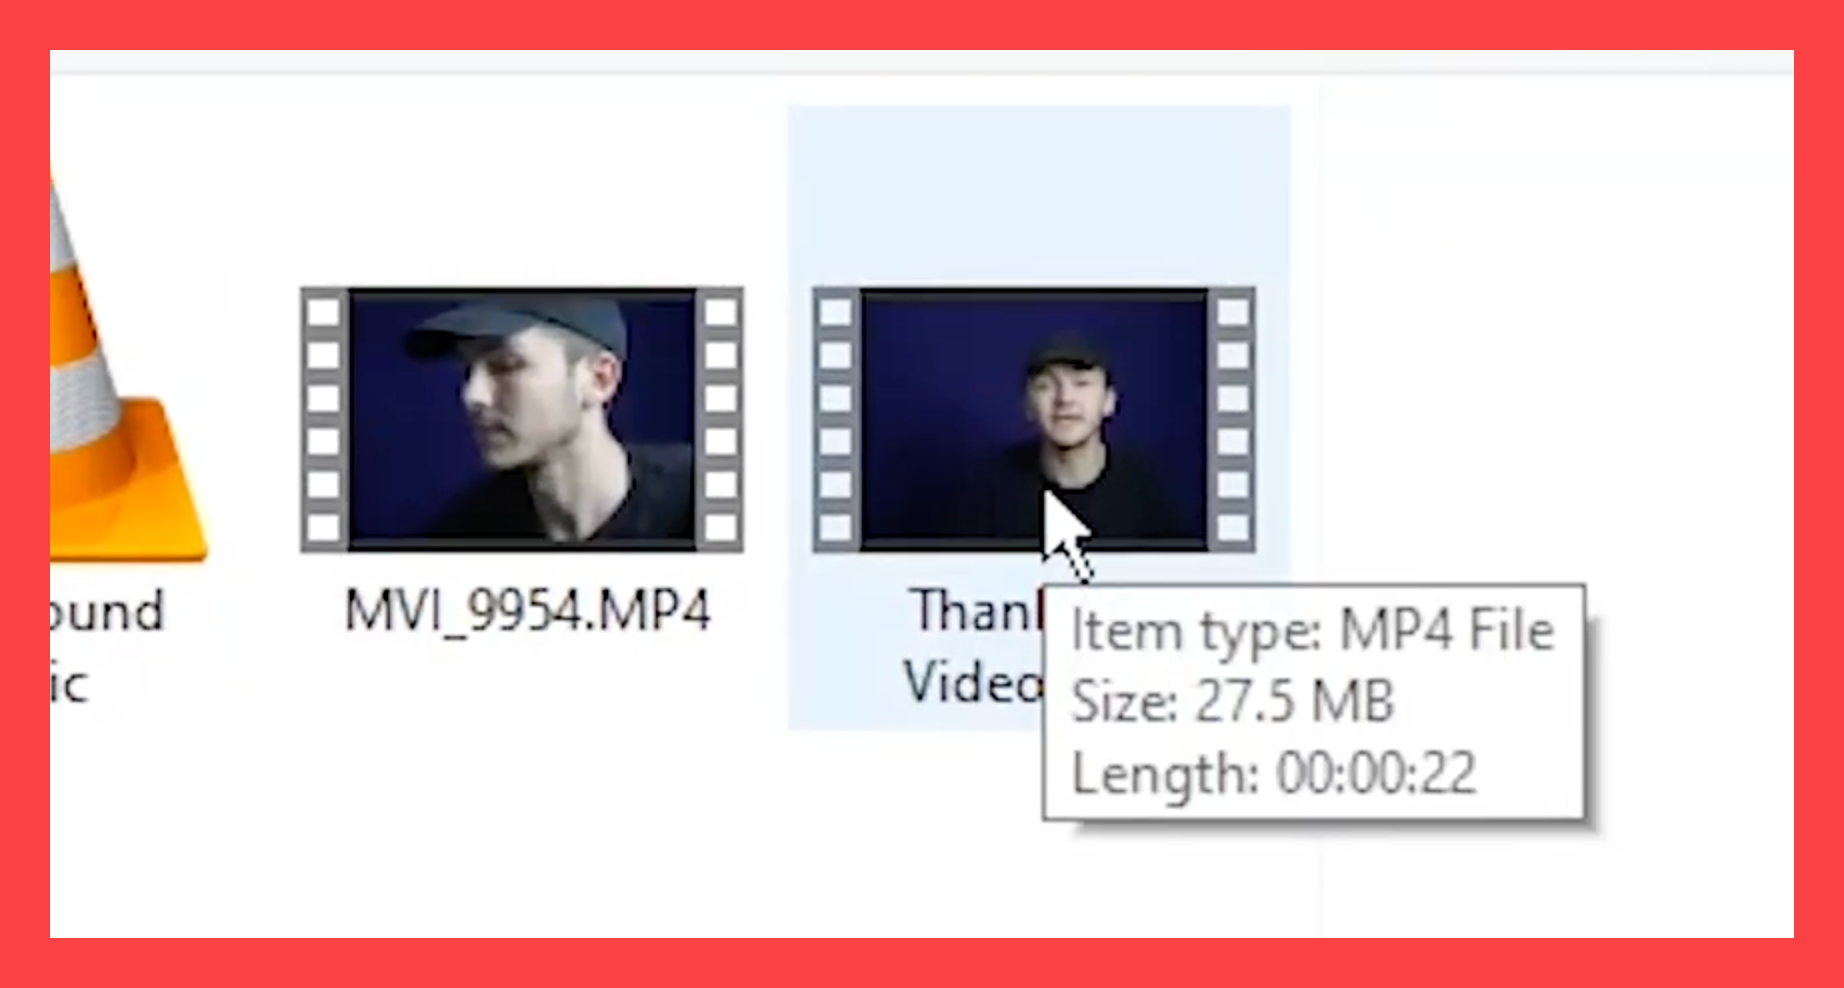
As you can see in the video, the file that Alec uploaded is at 27.5 MB. With VEED's onlne video compressor, we'll compress this file for email.
Step 2: Click on Export Settings
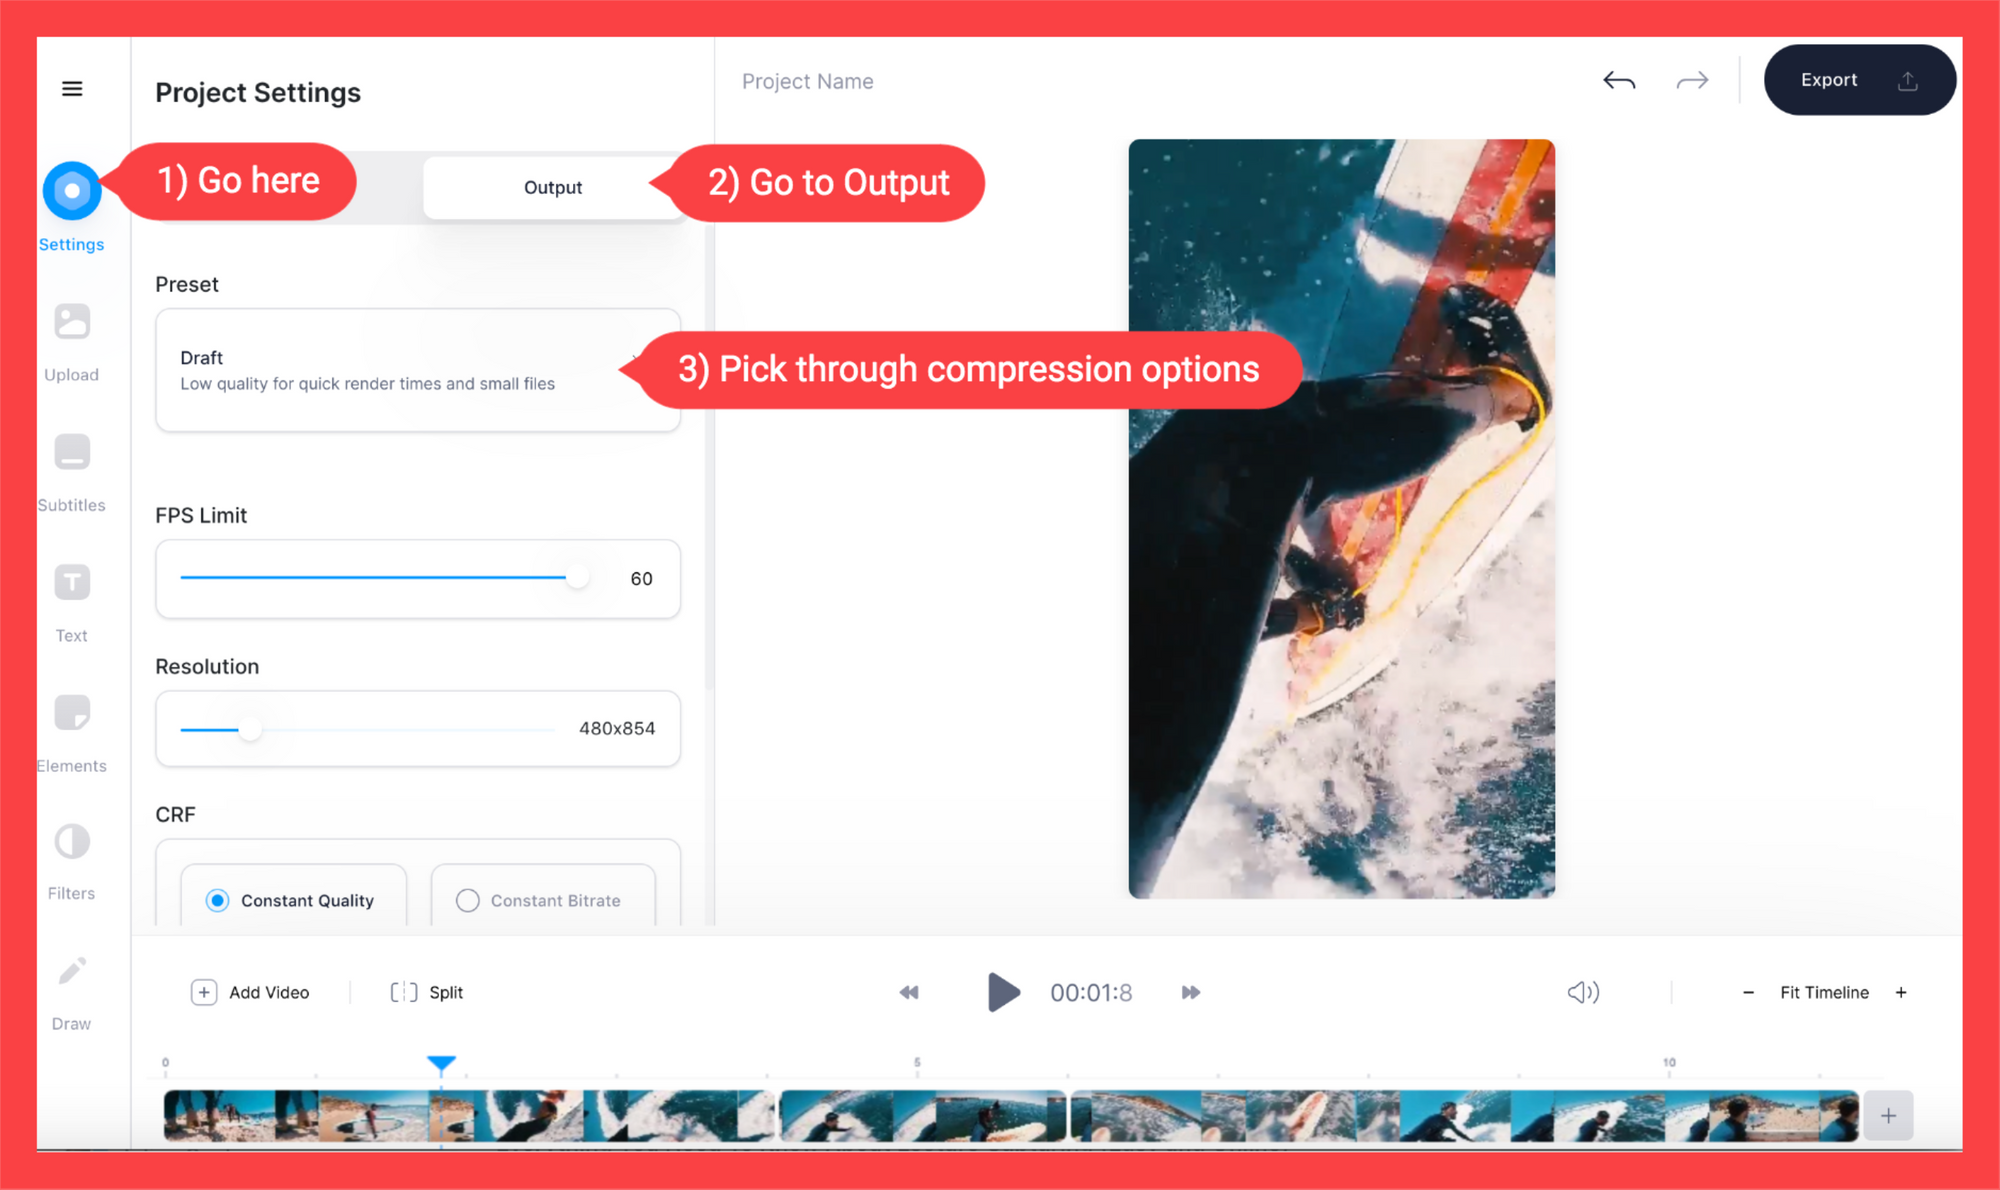
In the left toolbar, Settings → Output, choose through the Preset compression options.
Step 3: Choose a Predefined Option to Compress Your Video for Email or Social Media
In the video compressor, you’ll have the following predefined options with varying compression levels. These include:
- Draft - Get low-quality compression for quick render and small files. This is the perfect choice for compressing videos for email to under 20MB.
- Standard - Get standard-quality compression for slightly longer render times.
- HD - Have longer render times for higher-quality videos at larger file sizes. Not recommended if you want to compress your video for email.
- 4K - Get the highest-quality resolution with very long render times. 4K videos will most likely be larger than 20MB, so I don’t recommend this option if you want to compress your video for email.
- YouTube 720p/1080p/1440p/4K - Use YouTube’s recommended settings for the following resolutions. Choose one of these options if you’re uploading videos on YouTube, instead of the other alternative options. Why? Because they address YouTube’s weird compression algorithms that can turn HD videos look grainy once published on the platform.
- Twitter - Uses Twitter’s recommended settings.
- Instagram - Compress the video for Instagram.
If you’re looking to compress your videos for social media or YouTube, then you can just choose one of the predefined options.
What is render time? With VEED, after hitting Download, you’ll see that there is a loading time before you can directly download the video. This is the render time. And it’s affected by the size of your video and your compression options.
Larger and higher-quality files take longer to render because, well, they’re huge and take a lot of power to export. Smaller and lower-quality videos are faster to render.
Step 4: Or Compress Your Video for Email to Even Smaller Sizes Using Advanced Settings!
If you want to get more granular, click on the Advanced tab in the video compressor. Don’t get intimidated, though. The settings here are super easy to understand, and you’ll soon start changing them after some fast pointers on how they work.

What are the settings under the Advanced tab in the video compressor? Here’s what they mean:
- FPS or frames per second limit - Within a range of 5-60, this limits the number of frames that gets played per second. For example, if you compress and limit your FPS to 20 for an HD video that originally had 60 FPS, the new exported version will look more choppy due to the missing frames.
- Resolution - This refers to the visual quality of your videos and to the number of pixels that can be displayed in each dimension. As a rule of thumb, the higher it is, the higher-quality and larger your video gets, and vice-versa. On VEED, you can alter the resolution based on your existing aspect ratio or canvas size. To change the canvas size, click on the Canvas Size dropdown menu, on the top-left corner of the main platform page next to the Download button.
- CRF or Constant Rate Factor - This is an encoder mode that sets the file data rate up or down to achieve a selected video quality level. It shows up when you’ve clicked the Constant Quality option. In a nutshell, you need a big constant rate factor for low quality and small size. On VEED, there’s a CRF range of 15-30. Read our blog post about video formats and learn what these encoding settings are!
- Constant Bitrate - Aside from the CRF, you can choose Constant Bitrate instead. You can also use this for a more predictable compression. CRF tries to keep quality constant, while the bit rate tries to make the data rate constant. Constant bit rate is better for videos for streaming, but with the CRF, you can get an overall better compression ratio for your videos.
- Encoder preset - This is VEED’s own encoding preset, and the range indicates how this encoder should run. Compressing videos for email can require a lot of power. The faster your render time is, the bigger your file will be, and vice-versa. If you want to compress your video file for email at the lowest file size possible, definitely slide this to the right.
With everything that’s said and done, what are the ideal settings to effectively compress your video for email? Well, here it is:
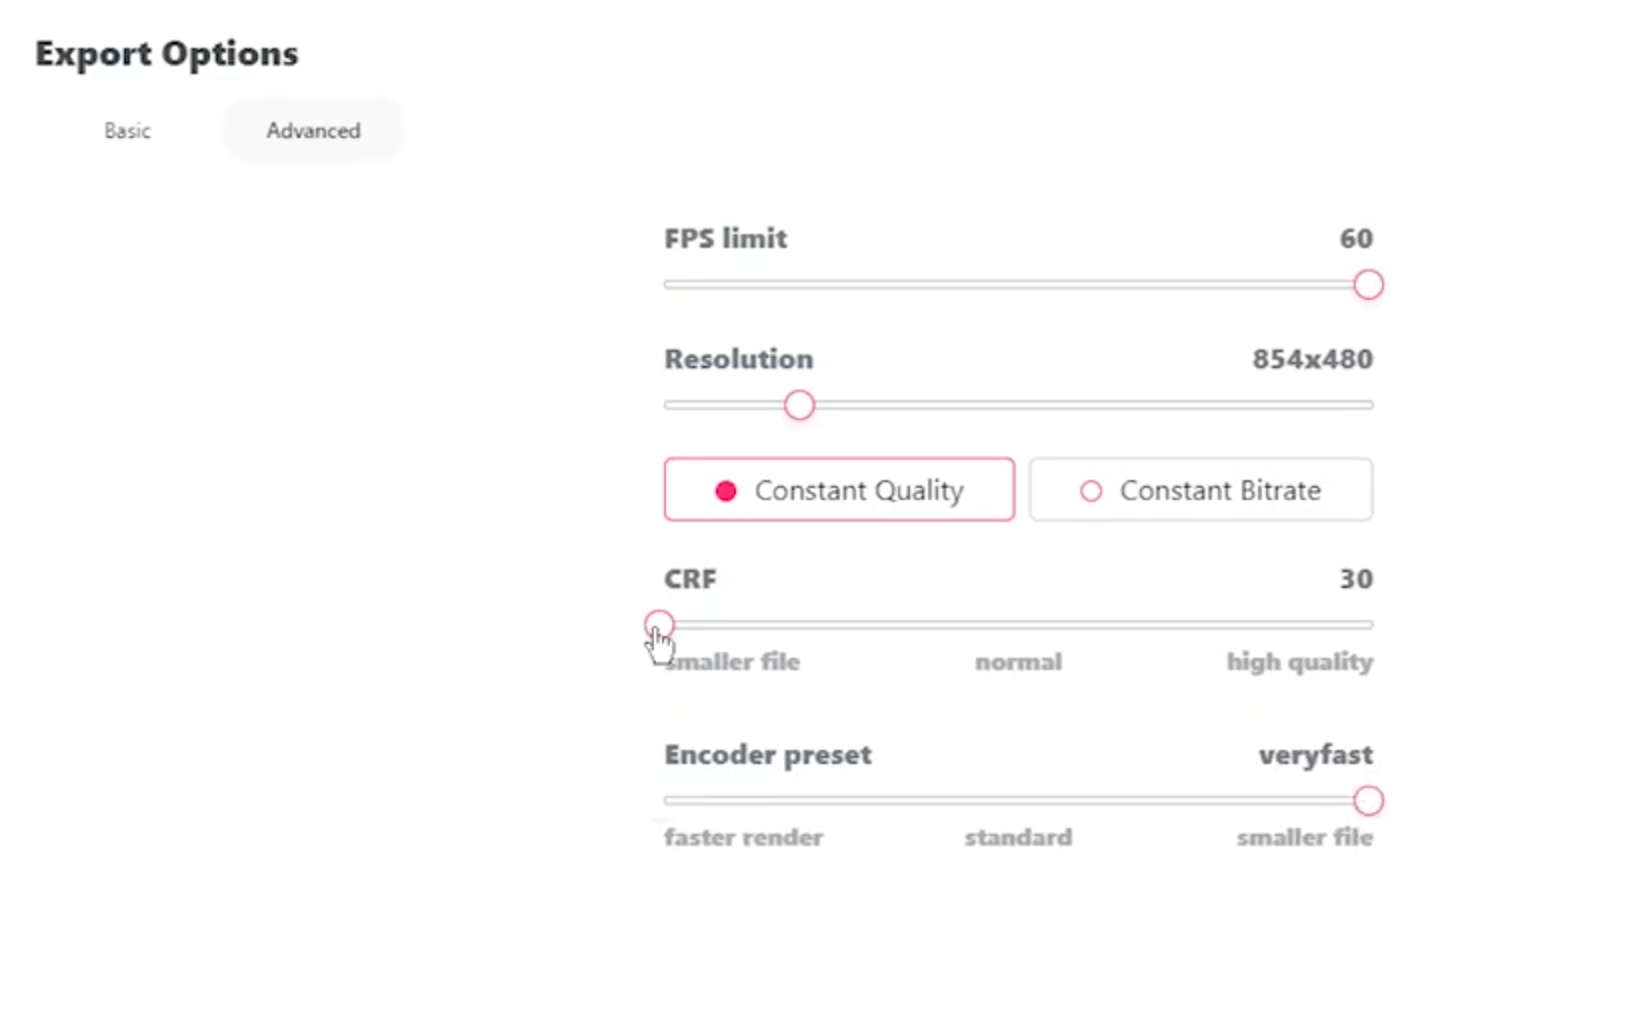
- FPS Limit - 60 (choppy videos are a no-no).
- Resolution - slide to the left to keep it at a minimum.
- CRF - Slide to the left to compress video for email to the lowest file size possible.
- Encoder preset - Slide to the right to compress to the lowest file size.
Step 5: Download video!
VEED will start rendering your video, depending on your export setting, video file size and how large your video is.
Now for the moment of truth. When you first saw this video file, it was at 27.5 MB.
Alec goes to his Downloads folder to see how big the new file is… ?

Boom! 933 KB! Just under 1 MB. A great file size for email!
The new compressed video file is more than 27.5 times smaller than the original file!
That’s pretty impressive and goes to show how VEED has a great video compressor tool to compress your videos for email and other social media platforms.
Now, the quality is not the best. If you want to tweak it a bit, you can go back to Export>Advanced and tweak the settings for a higher-quality video, in exchange for a larger file size. You can even check if some of the predefined options, such as Standard or Draft, are enough to compress your video file under 20 MB.
Step 6 (Optional): Download video as a GIF
Now, another option is to download the video file as a GIF. You can attach them to the email body or in your Facebook Messenger chats. In a way, this is a good alternative when you want to embed videos in emails that play once the email has been opened.
So if you don’t need sound, you can download it as a GIF! After hitting Download and waiting through the export time, you have the option to download the video as an MP4 or as a GIF.
Ready to Compress Your Videos for Email and Social Media?
With this super and quick tutorial, you’ve learned how to compress videos for email and social media.
With VEED’s easy-to-use and intuitive video editing tool to create professional video content in minutes, we’ve been able to compress a video file from 27.5 MB to 933 KB! We’ve also kept the quality loss at a minimum, while compressing down to an impressively low file size. But VEED is so much more than a video compressor. Create accurate subtitles automatically, add text to video, trim videos, add sound to videos, and so much more.
Interested in quickly editing your video, adding subtitles with no hassle whatsoever, and compressing your video for email and social media without losing much quality? Try VEED now for free.
